
This project is a wall-mounted LED matrix built to show album art, nearby transit and bikeshare information, and weather data.
Link to this section Motivation
Almost four years ago, I made the first iteration of a wall-mounted LED matrix project to show weather and transit info, and it's one of the projects I've gotten by far the most use out of. It's been hung at my childhood home in Maine, in various dorm rooms over my college years, and now at my apartment I share with Ava.
Over that time, we've made only a few changes:
- The display now automatically cycles between weather and transit info (since I like to see both before commuting).
- Weather info now displays in both Fahrenheit and Celsius (since Ava prefers the latter).
- Multiple upcoming trains are shown instead of just one.
However, as we've added each of these features, we've needed to pack more information into a very small (only 16x32!) screen. This tips the balance away from legibility (mostly fine for us, but less useful for guests at our house).
Simultaneously to this, the two of us got a record player shortly after moving in and have been starting to build a record collection, which has reinvigorated our appreciation of album art. I thought the idea of a piece of wall art to display album covers sounded cool, so I started looking at getting a variant of the LED matrix with a square aspect ratio.
Link to this section Technical Description
"Hardware Rev 2" is built around a 64x64 matrix panel with half the pixel pitch of the original, leading to a device with the same width and double the height. I decided to build it with a Raspberry Pi Zero 2W and a Matrix Bonnet from Adafruit with matching dimensions to shrink the electronics down from the original and let it sit closer to the wall.
This also meant that I could build this new revision without taking parts from the old build! I gave the old model to my girlfriend Mia.
Link to this section Software
I also chose to start from scratch with the software of this version. I've learned a lot about software development since writing the first iteration of the code, and the old design included way too many layers of abstraction. (Features like the preview display and web server were cool, but saw little day-to-day use.)
The display supports four main screens with information pulled from Spotify, weather, MBTA, and BlueBikes.

The Spotify screen just displays the artwork from whichever album Ava or I am listening to at a given moment. While I was initially happy to see Spotify's CDN making a perfectly-sized 64x64 version of the image available, it seems to be too affected by JPEG artifacts to be usable here. So, I settle for downscaling a higher-resolution version.
Spotify data is pulled using the spotipy library.

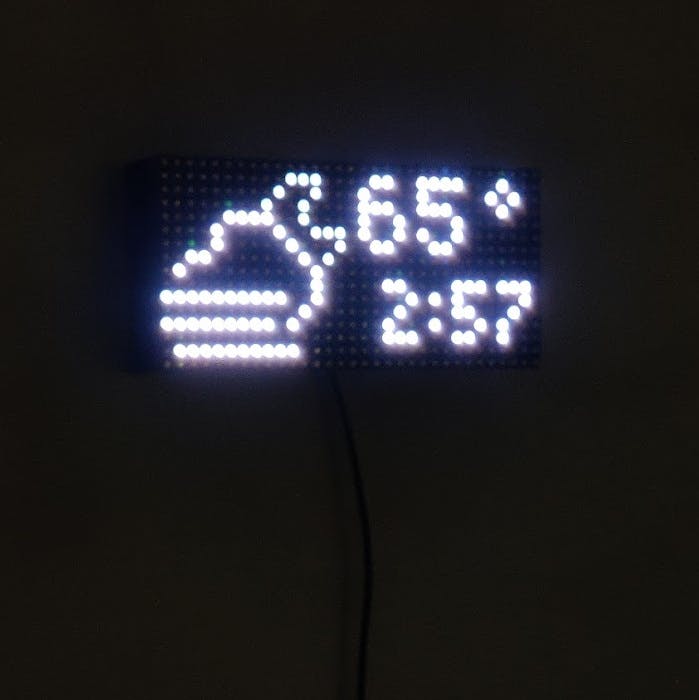
The weather screen is pretty similar to the weather screen on the old version, showing an icon from Dhole's awesome weather pixel icons alongside the current time, temperature, and high/low temp for the day. (Thankfully, we now have labels corresponding to the F and C temperatures.) Data is sourced from OpenWeatherMap, using a lookup table I made to match their weather condition codes to weather pixel icons.

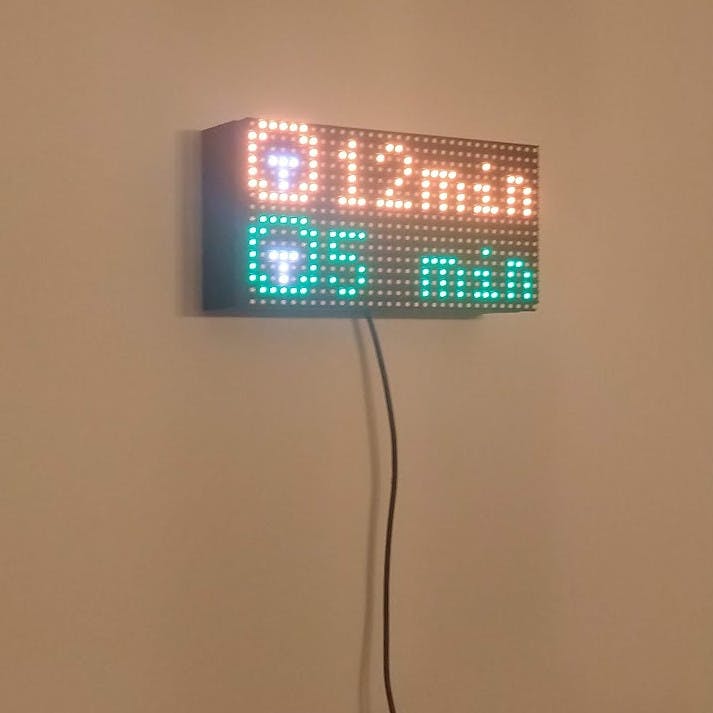
The MBTA screen is designed to mimic a station countdown clock, but with data pulled from several bus and train lines near my apartment. It merges schedules and realtime predictions from the MBTA Realtime API. I've written some custom logic to try to deduplicate schedule and realtime data based on trip identifiers, but it doesn't always work perfectly.

The BlueBikes screen is probably the one I'm most proud of. I hand-drew each of the icons for bikes, e-bikes, and docks that show for each station.
Bikeshare services publish realtime using the General Bikeshare Feed Specification format (GBFS), analogous to the GTFS format used for transit data. The BlueBikes API has excellent documentation. It's a bit inefficient (there's no way to filter to just a subset of stations that I've found yet), but it works great for this use case.

My friends and I have fun with a website called makea.fish, which generates an image of a fish at 11:11. (We've worked on various other fish generators, too!)
As a fun easter egg, the LED matrix will switch at 11:11 to showing a fish image generated by makea.fish which refreshes every 10 seconds.
Link to this section Hardware

A view of the back of the device, showing the 3M command strips used to hang it on the wall
Just like the original, this LED matrix sign is contained within a 3D-printed enclosure. It uses a Raspberry Pi Zero 2W (my first project with a Pi Zero!) with Adafruit's Matrix Bonnet, using a DC jack "extender" I soldered to route the power input to the bottom of the device.
The case features a "chin", since the stackup height of the electronics is annoyingly tall. I also added ventilation holes, since there was a bit of discoloration on the wall from the old design. This was my first 3D printing project in a while (outside of my day job working with volumetric printing).
Quite a long time ago (was it middle school??), I bought a Monoprice Select Mini 3D printer. It held up surprisingly well over the years, including through two hotend replacements. This is the printer that the old LED sign case was printed with! It had a print volume of only 120x120x120mm, so I had to break up the piece into two separate parts.
A few years ago, I bought an Ender 3 Pro during a Micro Center sale. (Annoyingly, I was living away from Boston over the summer, so I ended up grabbing it and lugging it around for a full day of sightseeing with my parents -- in my defense, the sale was about to expire!) I set it up and ran a few prints, but could seemingly never get it to work as well as my old Monoprice one. While I used this for the rave choker project, it just didn't work well for printing larger parts. It spent a few years collecting dust at my parents' house.
Then, earlier this year, I decided to take the printer back down to my apartment and try to get it up and running again. I ended up doing almost a full rebuild, and found just two loose screws holding the Z-axis stepper in place (maybe vibrated out, maybe not tightened properly in the first place). After tightening those, the parts for this project came out beautifully!
The Ender 3 is large enough to fit the full size of the LED matrix, but isn't quite big enough to print the entire case in one piece. Thus, I broke the part up into the frame around the LED matrix and the "chin" below which contains the Raspberry Pi. The two parts are attached using heat-set inserts.
And as for why the parts are pink instead of black: after years of being stored badly, the pink spool was one of the only ones I had which wasn't made too brittle by the humidity. (Plus, the pink and black scheme is growing on me...)
Link to this section Conclusion
I'm really happy with this! It fits nicely into our living space and does its job of both looking unique and providing useful info. I have thought of a few improvements to make, which will maybe happen at some point. There's a lot of empty space in the enclosure right now!
- Automatic brightness adjustment: The sign easily lights up a dark room. I keep it out in the living room instead of the bedroom, so it's not a big deal, but it'd still be a nice touch.
- On-device controls: It would be nice to be able to configure the device, change modes, turn on/off, etc. with some interface on the device itself. While the display could be reused for an on-screen menu system, we'd need some form of button for user input. It would definitely need to be minimal (I don't want this to turn into a wall-mounted gameboy). I think an encoder with pushbutton might be a nice touch, since the only thing visible to the outside would be a single knob.
- Cloud interaction: The old matrix had a website where anyone could enter a message and it would scroll across the screen. I haven't added anything like this to the new code (yet), but it'd be pretty fun! (Maybe it could even show drawings using the increased resolution...)
It also feels quite polished compared to a lot of the quick builds I've done, like I could do a small run of these. The parts costs are a bit high (mostly the LED matrix itself), so that'll probably never happen, but I can dream!